How Does a Food Processor Work Step-by-Step
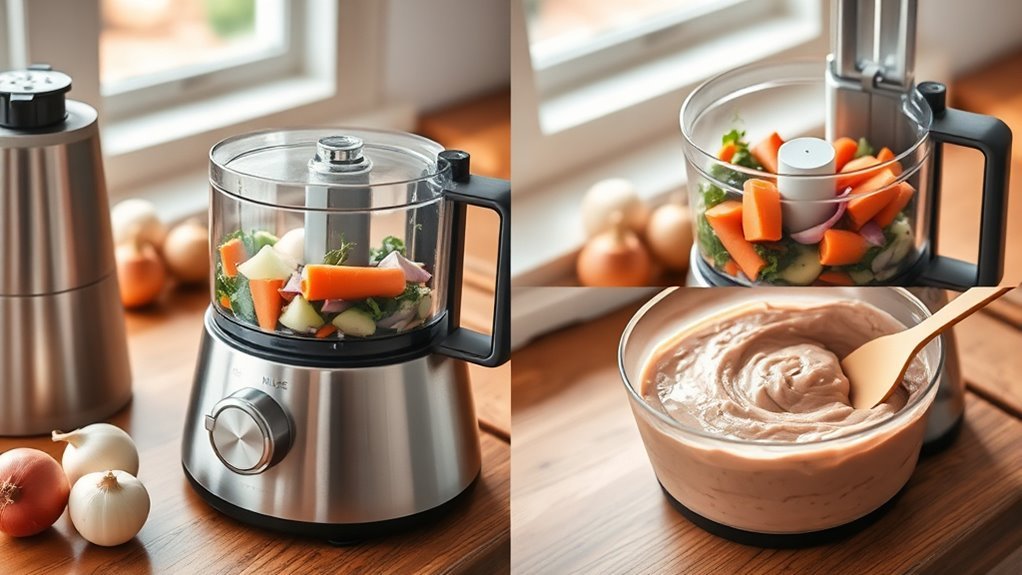
You start by locking the bowl and lid securely onto the motor base, then select and attach the right blade or disc for your task.
Add ingredients safely through the feed tube using the plunger, never your fingers.
Choose speed or pulse settings to control texture.
Pulse for coarse cuts, low speed for gentle mixing, and high speed for pureeing.
Liquids go in slowly while running to prevent splashes.
Keep going to uncover tips on attachments, textures, and maintenance.
How The Motor And Base Power Your Food Processor

When you lock the bowl and lid into place, the motor housed in the food processor’s base springs into action. It transfers stable torque through a coupling to spin the blades or discs. This motor, usually between 300 and 1200 watts for home models, drives the central shaft and attachments without the unit shifting during use.
You control the speed with settings like low, high, or pulse. Low speed offers gentle cutting or kneading, while high speed handles shredding and pureeing. The pulse option gives you short bursts to avoid over-processing.
Different attachments rely on the motor’s power differently. Flat S-blades spin rapidly for shearing, while discs rotate steadily on a spindle for slicing or shredding. Safety interlocks make sure the motor won’t run unless the bowl and lid are securely locked, so you stay protected while the food processor works efficiently.
Getting To Know Your Food Processor’s Bowl And Lid
Your food processor’s bowl is a sturdy container that locks onto the motor base. It holds the blades and discs in place so everything stays secure while you’re working.
The lid snaps right onto the bowl and usually has a feed tube with a plunger. This makes it easy and safe to add ingredients as you go.
Just make sure both the bowl and lid are properly locked before you start the motor. This helps avoid leaks and keeps everything running smoothly.
Bowl Design Features
Several key design features make your food processor’s bowl and lid essential for safe and efficient operation. The bowl, made of durable transparent plastic, locks onto the motor base and aligns with the central shaft to hold blades firmly.
You’ll find various bowl sizes that fit the same base, letting you choose a wide bowl for large batches or a smaller one for compact tasks. The lid locks onto the bowl and includes a feed tube and plunger.
The feed tube varies in diameter. Wider tubes allow you to process larger items like whole apples, while narrower ones work well for thin slices or long vegetables such as carrots. Since these bowls aren’t tapered like blender jars, you’ll need to make sure the bowl and lid are seated correctly to avoid leaks when handling liquids.
Lid Locking Mechanism
Although the bowl and lid form the core structure, the lid locking mechanism guarantees your food processor operates safely and effectively. This mechanism assures the motor won’t start unless the lid locks securely, preventing accidents.
Here’s what you should know:
- Align and twist the lid into place, often guided by arrows or a click, to lock it properly.
- The lid’s feed tube and plunger fit into a groove on the bowl; larger tubes may require wider openings and affect how the lid locks.
- Each bowl size pairs with a matching lid featuring tabs or notches to prevent mismatched locking on the base.
- Always make certain the lid’s sealing gasket is seated correctly to prevent leaks during processing.
This safety design helps the base prevent operation if the lid isn’t securely locked.
How To Choose And Attach Food Processor Blades And Discs
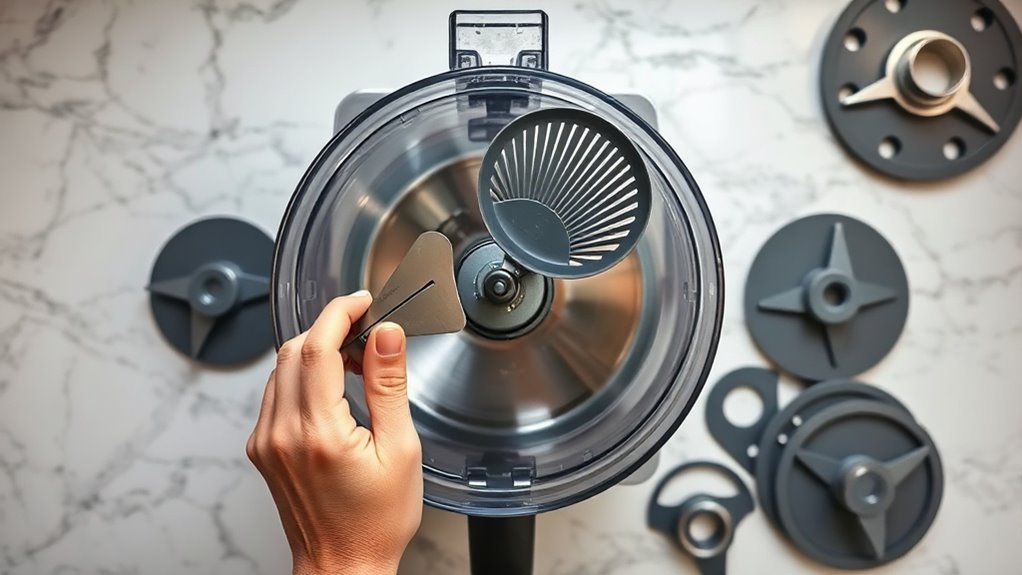
Getting the right blade or disc in place starts with identifying the central shaft inside the bowl. The S-shaped (Sabatier) blade fits over the short metal spindle at the bowl’s center and is perfect for chopping and pureeing.
If you want to slice or shred, like shredding cheese, use the metal discs that mount on the taller disc stem locking into the motor hub. Choose blades based on task: metal S-blades handle wet chopping and stay sharp longer, plastic dough blades knead, and metal discs give uniform slices or shreds in fine, medium, or coarse textures.
Match the disc size to your bowl. Larger bowls fit bigger discs for large batches. When attaching blades or discs, make certain they’re seated correctly, then lock the lid and feed tube.
This alignment lets the motor engage safely and keeps the attachment spinning true for consistent results every time.
Adding Ingredients Safely Through Your Food Processor’s Feed Tube
Before you start adding ingredients, double-check that the bowl and lid are locked in place. This keeps your food processor running safely without any hiccups.
Next, pick the right size feed tube for what you’re adding. This helps prevent jams and gives you better control over the process.
And here’s an important tip: always use the plunger to push food through the feed tube. Never use your fingers or any utensils — safety first! Also, keep an eye on how full the bowl gets to avoid any messy spills.
Using The Feed Tube
When using the feed tube, always lock the bowl and lid into place to guarantee the motor engages and the plunger works safely. The feed tube lets you add ingredients gradually while the processor runs, perfect for emulsifying dressings or sauces. Here’s how to use it effectively:
- Cut large ingredients to fit the feed tube’s size and never force items through.
- Use the plunger, never your fingers or metal utensils, to push food safely down the tube.
- Add sticky or fibrous foods in short pulses to prevent clogging.
- Stop occasionally to scrape the bowl if processing large amounts.
Following these steps helps you use the feed tube efficiently and keeps your food processor running smoothly.
Choosing Proper Tube Size
Using the feed tube properly means also choosing the right size for the ingredients you want to add. For whole vegetables, large fruit halves, or when using shredding and slicing discs, opt for a wide feed tube (2.5–3+ inches). This lets you avoid pre-cutting and speeds up processing.
For smaller items like carrots or celery sticks, a narrow tube (about 1–1.5 inches) works best, allowing you to add ingredients gradually and safely. Always leave enough room in the tube for the plunger and proper circulation to prevent strain on the motor and blades.
If the tube gets crowded, process in batches. Remember, use the plunger to push ingredients down and never insert your hands or utensils into the feed tube to keep things safe.
Safety Tips For Feeding
You should always turn off and unplug your food processor before removing the lid or changing attachments to keep your hands safe from moving blades. When feeding ingredients, follow these safety tips:
- Use the feed-tube plunger to push food down, never your fingers or utensils. Keep your hands clear of the feed tube opening while the unit runs.
- Cut large pieces to fit the feed tube or use a wider tube if available. This helps prevent jams and ensures smooth processing.
- Add liquids slowly through the feed tube or its small cap while the motor runs. Doing this avoids splashing and leaks.
- Hold the lid and feed-tube plunger securely. Pulse for short bursts when processing firm or uneven items to prevent clogging or sudden movements.
Mastering Pulse And Speed Settings
Although mastering the pulse and speed settings on your food processor might seem tricky at first, understanding their distinct functions gives you precise control over texture and consistency. Use the pulse button in short bursts of 1–2 seconds to chop vegetables or create coarse salsas without over-processing. Avoid running it continuously to prevent turning your ingredients into mush.
Low speed is perfect for gentle tasks like mixing dough or shredding, helping you avoid warming or overworking your mixture. High speed works best for rapid pureeing and emulsifying, such as making smooth hummus or nut butter, but keep a close eye on the time since too long can generate heat and alter texture.
When you want both coarse and fine results, alternate short pulses with brief continuous runs. For the most precise control, test small amounts first: try 3–5 pulses for coarse chopping, 6–8 for medium, and over 10 seconds on high speed for fine or pureed textures.
How The S-Shaped Blade Chops And Purees Food
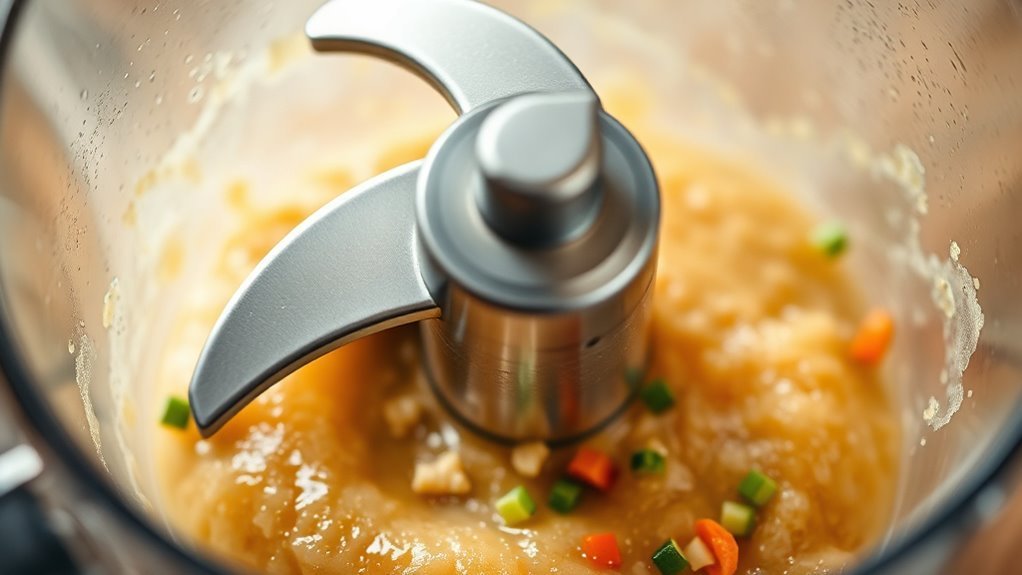
The S-shaped blade spins rapidly on the processor’s central shaft, slicing through food with its two curved metal arms by shearing ingredients against the bowl and other particles. This high-speed blade performs repeated chopping and folding, breaking down larger pieces into smaller, uniform bits. Here’s how it works:
The S-shaped blade rapidly slices and folds food, transforming large pieces into smaller, uniform bits with precision.
- The sharp, stainless-steel edges slice food efficiently with each rotation.
- Centrifugal force and bowl movement push food back toward the blade for further chopping.
- Continuous recirculation combined with the high-speed blade breaks down cell walls, releasing liquids and fats for smooth purees.
- Using short pulses lets you control texture, preventing over-processing and allowing chunkier or fully pureed results.
How To Use Food Processor Shredding And Slicing Discs For Different Textures
When selecting a disc for your food processor, locking the right one onto the stem guarantees you get the texture you want. Choose fine shredding for delicate cheese or carrots, medium for coleslaw, and coarse for rustic hash or salad toppings.
Slicing discs create uniform, flat slices perfect for salads or gratins. Use the wider bowl and larger feed tube for bulky items like cabbage or potatoes. The smaller tube works best for thin sticks to keep slices even and avoid jams.
For slicing, process gently and continuously. For shredding, pulse briefly to control shred size and prevent over-processing. To get crisper, more distinct shreds or slices, chill firm foods like cheese or potatoes for 15–30 minutes before processing.
Always feed ingredients steadily using the plunger, and never swap discs while the motor’s running. This method guarantees you achieve the perfect texture every time with your shredding and slicing discs.
How Food Processor Dough Blades And Whips Mix And Knead Ingredients
You’ll notice that dough blades knead ingredients gently by rotating slowly. This slow movement folds and stretches the dough without overworking it. On the other hand, whip attachments spin really fast to incorporate air. They’re perfect for whipping cream or egg whites to just the right stiffness. When you understand how these tools work, it’s easier to get the ideal texture for your recipes.
Dough Blade Functionality
Dough blades gently fold and knead ingredients, using short, blunt paddles that spin around the processor’s central shaft without cutting gluten strands. This unique design helps you develop gluten quickly while preserving dough texture. Here’s how the dough blade works:
- It mixes flour, water, salt, and yeast into a cohesive ball by folding and pressing the dough against the bowl’s sides.
- The friction generates slight heat, which helps gluten form and warms the dough.
- The wide, flat bowl shape lets the dough blade handle stiff doughs like bread and pizza without adding extra liquid.
- Short kneading cycles prevent overworking, so you avoid dough that’s too elastic or overheated.
Using the dough blade properly speeds up kneading and delivers perfect dough every time.
Whip Attachment Uses
Several food processor attachments work together to mix and knead ingredients efficiently, each serving a unique purpose. The whip attachment, with its two open-armed paddles, spins rapidly to incorporate air into egg whites and cream. This helps you achieve stiff peaks much faster than manual whisking.
Use the whip only in bowls with enough headroom and for high-liquid tasks like whipping egg whites. On the other hand, the dough blade kneads heavier, low-liquid mixtures such as bread dough by folding and compressing it slowly. This mimics hand-kneading without overworking gluten.
When using the dough blade, pulse in short bursts and scrape the bowl between cycles to develop gluten gradually and avoid overheating. Both attachments make sure you get the right texture, whether aerating egg whites or kneading dough. They make your food prep easier and more efficient.
Tips For Processing Nut Butters And Dry Ingredients In Your Food Processor
When making nut butters or processing dry ingredients, choosing the right bowl and blade plays a crucial role in achieving the best texture. Food processors work best with a wide, low-profile bowl and a sharp Sabatier (S-shaped) blade to keep nut butters smooth and dry ingredients evenly ground.
Selecting a wide bowl and sharp Sabatier blade ensures smooth nut butters and evenly ground dry ingredients.
- Use roasted, cooled nuts and pulse in 15 to 30 second bursts, scraping sides every 30 to 60 seconds to avoid overheating and clumping.
- Process nuts for 2 to 6 minutes depending on oil content; expect crumbs turning into smooth butter as oils release.
- Add 1 to 2 teaspoons of neutral oil per cup only if needed to loosen nut butter. Avoid excess liquid to prevent leaks.
- For dry ingredients like flour or spices, use short pulses and tap the bowl to reduce static and clumping. Adding a bit of sugar or salt can help too.
Following these tips guarantees your food processors deliver consistent, quality results every time.
How To Clean And Maintain Your Food Processor Properly
To keep your food processor running smoothly, start by unplugging it and taking apart all removable pieces right after use. Rinse scraps immediately to prevent drying and staining.
Wash plastic parts and metal discs or sharp blades in warm soapy water or place them on the dishwasher’s top rack if allowed by the manufacturer. Avoid high-heat cycles to prevent warping, especially with older or thin plastics.
Clean the motor base by wiping it with a damp cloth and mild detergent. Never submerge it in water or run it under the tap to protect electrical components. Use a soft brush or toothpick to remove stubborn food from sharp blades and feed tubes, handling blades carefully to avoid cuts.
Make sure all parts dry completely before reassembly to prevent mold and corrosion. Periodically inspect seals and locking mechanisms, replace cracked gaskets or warped bowls, and lubricate rubber seals as the manual suggests to maintain airtight performance and prevent leaks.
Frequently Asked Questions
Can I Use My Food Processor to Make Hot Soups?
Yes, you can use your food processor for hot blending, but you need to be careful. Always let cooked ingredients cool slightly before processing to avoid damaging your machine or causing splashes.
Process in small batches with the lid vented, and never overfill past the recommended line. For very hot soups, consider using a metal bowl or a blender with a vented lid to handle the heat safely and avoid warping or leaks.
Are Food Processors Safe for Children to Use?
Food processors can be safe for children to use, but only with close child supervision. You should never let them operate the machine alone, since the blades are sharp and fast-spinning.
Always demonstrate how to lock the lid properly and remind kids never to put their fingers or utensils inside while it’s running. Assign age-appropriate tasks like loading ingredients or pressing buttons, while you handle blade changes and cleaning for their safety.
What Should I Do if My Food Processor Overheats?
If your food processor overheats, unplug it immediately and let it cool for 15 to 30 minutes so the thermal trip reset can activate. Check for any jams or overloading, especially with fibrous or frozen food, and reduce the batch size before restarting.
Make sure the blades and discs are properly aligned. If it overheats again after cooling, have a technician inspect it to avoid motor damage or electrical issues.
Can I Store Food Inside the Food Processor Bowl?
Yes, you can use bowl storage for short periods, like a few hours, as long as the lid locks securely. Just remove sharp blades first to keep things safe and prevent damage.
Keep in mind, some lids aren’t airtight, so food might dry out or absorb fridge odors. For longer storage or wet foods, it’s smarter to transfer your food to an airtight container instead of leaving it in the bowl.
How Long Do Food Processor Blades Typically Last?
Food processor blade lifespan typically ranges from 2 to 5 years with regular home use, depending on how often and what you process. If you chop hard items like ice or frozen fruit, expect blades to wear out faster, sometimes within 6 to 18 months.
Keep an eye out for longer chopping times or uneven cuts. These are signs you need replacements. Taking care of your blades by hand-drying and avoiding misuse can really extend their lifespan.
Conclusion
Now that you’ve revealed the secrets of your food processor, you’re basically a kitchen superhero! With its motor roaring like a beast and blades spinning faster than a tornado, you can whip, chop, slice, and knead anything in seconds.
Say goodbye to boring prep work forever. Your food processor is your ultimate sidekick, turning even the toughest ingredients into culinary magic. Get ready to conquer every recipe like a pro, effortlessly!